Irresistible No-Bake Mini Cheesecake Cups in 15 Minutes
As summer rolls in, so does the craving for light and refreshing desserts. I remember the first time I made these No-Bake Mini Cheesecake Cups. It was a warm afternoon, and I had some friends over for a casual gathering. The moment I set these adorable little treats on the table, they vanished within minutes! The creamy filling, sweet toppings, and buttery crust made them irresistible. Best of all, I whipped them up in just fifteen minutes without turning on the oven. If you’re looking for a treat that’s sure to impress yet quick to prepare, you’ve come to the right place!
Why make this recipe?
You absolutely need to try these mini cheesecake cups for several reasons. First off, the taste is truly divine. The creamy cheesecake filling perfectly complements the crunchy graham cracker crust, creating a delightful contrast. Plus, they are delightfully customizable, so you can make them suit any occasion.
Next, they’re incredibly easy to prepare! You don’t need to be a baking whiz to pull these off. This recipe is perfect for beginners and a great way to involve kids in the kitchen. They love adding the toppings, and it’s a fun, hands-on way to teach them about cooking.
Lastly, they’re budget-friendly. With everyday ingredients, you can create a lovely dessert without breaking the bank. These mini cheesecakes make a fantastic addition to any gathering, be it a birthday party, potluck, or just a sweet treat at home. Trust me, your friends and family will thank you!
How to make No-Bake Mini Cheesecake Cups
Making these mini cheesecakes takes about 15 minutes of hands-on time, followed by a little chilling in the fridge. It’s a straightforward process, so you don’t need any special kitchen tools beyond mixing bowls and measuring cups. I promise you’ll feel like a rockstar as you serve these luscious desserts!

Ingredients
Here’s what you need to create these delicious No-Bake Mini Cheesecake Cups:
- 1 cup graham cracker crumbs
- 3 tbsp melted butter
- 8 oz cream cheese, softened
- 1/4 cup sugar
- 1 tsp vanilla extract
- 1/2 cup heavy cream
- Fresh berries for topping
Step-by-step directions
Let’s get into the fun part: preparing your mini cheesecake cups! Follow these easy steps to create your dessert masterpiece.
- Mix the graham cracker crumbs and melted butter in a bowl until they resemble wet sand.
- Press this mixture firmly into the bottom of small cups or jars to form the crust.
- In another bowl, beat the softened cream cheese, sugar, and vanilla extract until smooth and creamy.
- Whip the heavy cream in a separate bowl until stiff peaks form, then gently fold it into the cream cheese mixture.
- Spoon the creamy filling over the crust in each cup, filling them generously.
- Chill the mini cheesecakes in the fridge for at least 2 hours before serving to let them set.
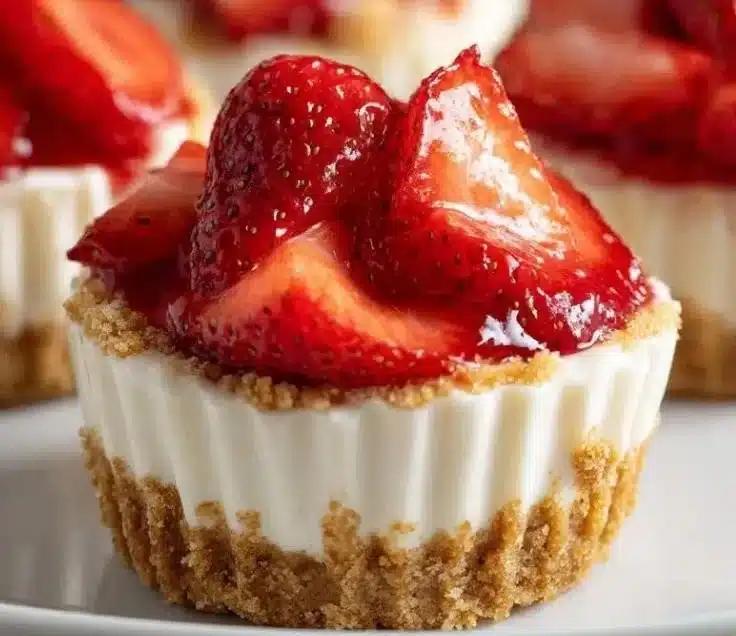
- Just before serving, top each cup with fresh berries for that burst of color and flavor.

How to serve No-Bake Mini Cheesecake Cups?
Serving these delightful cheesecake cups is a breeze! You can present them directly in their jars or cups for a charming rustic look. Consider adding a little sprig of mint on top for extra flair. These mini treats pair wonderfully with a cup of coffee or tea, making them a perfect companion for afternoon gatherings. If you want to elevate your serving style, consider offering a variety of toppings such as crushed nuts, chocolate shavings, or a drizzle of caramel sauce.
How to store No-Bake Mini Cheesecake Cups?
You can enjoy these mini cheesecakes for several days! Store them in the refrigerator for up to 5 days. Just remember to cover them securely with plastic wrap or a lid to keep them fresh. If you want to make them ahead of time, you can also freeze the cups. They will last up to 2 months in the freezer. To enjoy, simply transfer them from the freezer to the fridge and let them thaw overnight. No need to reheat; they taste best cold!
Tips for perfect No-Bake Mini Cheesecake Cups
Room Temperature Cream Cheese: Make sure your cream cheese is at room temperature before mixing. This prevents the filling from becoming lumpy and helps achieve that creamy texture.
Whip the Cream Well: When whipping the heavy cream, aim for stiff peaks. This gives your cheesecake a light and airy texture.
Press Firmly: When making the crust, press the graham cracker mixture firmly into the bottoms of the cups to create a sturdy base.
Chill Time is Key: Don’t skip the chilling process. Allow those cheesecakes to set up properly in the fridge; this makes a significant difference in taste and consistency.
Taste Test the Filling: Feel free to taste the filling before you fill the cups! Adjust the sugar if needed to suit your sweetness preference.
Variations
Looking for ways to shake things up? Here are a couple of ideas to modify your mini cheesecakes:
Flavor Infusions: Try adding a bit of lemon zest or some melted chocolate to the cream cheese mixture for a new flavor twist. Lemon gives a refreshing tang, while chocolate adds richness.
Healthy Version: For a lighter version, use Greek yogurt instead of cream cheese. It will give you a tangy flavor and a boost of protein!
Mix and Match Toppings: Get creative with your toppings! Instead of berries, try crushed cookies, a layer of pie filling, or even a drizzle of chocolate sauce.
FAQs about No-Bake Mini Cheesecake Cups
Can I substitute the cream cheese?
Absolutely! If you want a lighter option, try using ricotta cheese or Greek yogurt. Keep in mind that this will change the flavor and consistency, so make sure to adjust other ingredients accordingly.
Why did my cheesecake filling curdle?
Curdling usually happens if the cream cheese isn’t softened before mixing. Always make sure to let it come to room temperature for a smooth blending.
Will it work if I reduce the sugar?
Yes, you can certainly reduce the sugar in the filling. Just remember that sugar enhances the flavor, so the cheesecakes may taste less sweet. Adjust based on your preference!
Now, with this recipe, you’re all set to impress family and friends! Enjoy your delightful No-Bake Mini Cheesecake Cups, and watch them disappear faster than you can make them!
Print
No-Bake Mini Cheesecake Cups
- Total Time: 135 minutes
- Yield: 4 servings 1x
- Diet: Vegetarian
Description
Deliciously creamy No-Bake Mini Cheesecake Cups with a crunchy graham cracker crust, perfect for summer gatherings.
Ingredients
- 1 cup graham cracker crumbs
- 3 tbsp melted butter
- 8 oz cream cheese, softened
- 1/4 cup sugar
- 1 tsp vanilla extract
- 1/2 cup heavy cream
- Fresh berries for topping
Instructions
- Mix the graham cracker crumbs and melted butter in a bowl until they resemble wet sand.
- Press this mixture firmly into the bottom of small cups or jars to form the crust.
- In another bowl, beat the softened cream cheese, sugar, and vanilla extract until smooth and creamy.
- Whip the heavy cream in a separate bowl until stiff peaks form, then gently fold it into the cream cheese mixture.
- Spoon the creamy filling over the crust in each cup, filling them generously.
- Chill the mini cheesecakes in the fridge for at least 120 minutes before serving to let them set.
- Top each cup with fresh berries before serving for added color and flavor.
Notes
Serve directly in jars or cups for a rustic look. Store in the fridge for up to 5 days or freeze for up to 2 months.
- Prep Time: 15 minutes
- Cook Time: 0 minutes
- Category: Dessert
- Method: No-Bake
- Cuisine: American
Nutrition
- Serving Size: 1 serving
- Calories: 250
- Sugar: 10g
- Sodium: 200mg
- Fat: 15g
- Saturated Fat: 9g
- Unsaturated Fat: 4g
- Trans Fat: 0g
- Carbohydrates: 22g
- Fiber: 1g
- Protein: 4g
- Cholesterol: 40mg
Keywords: cheesecake, no-bake dessert, summer dessert, mini desserts