
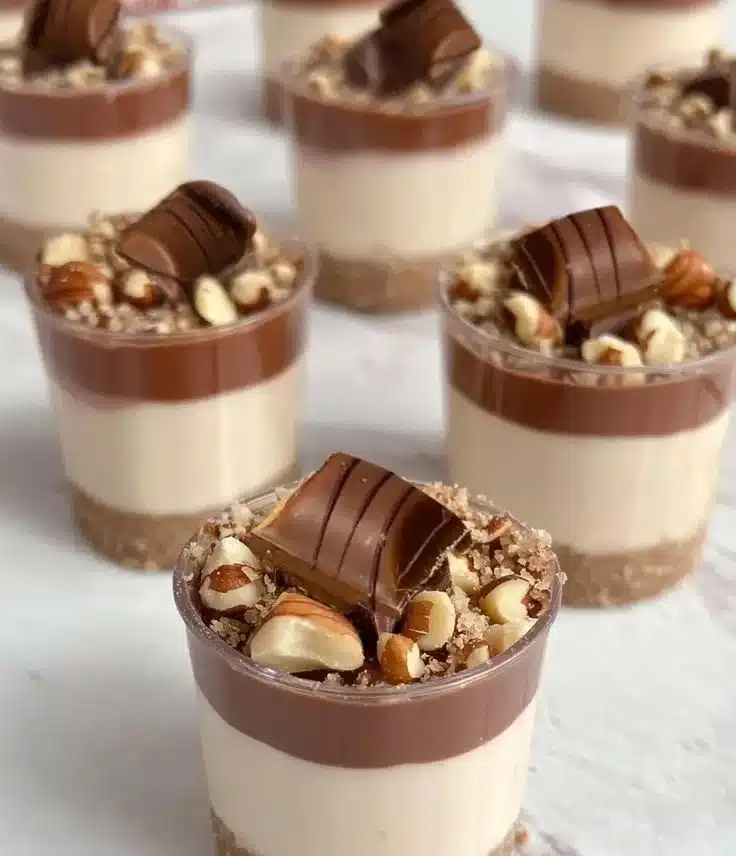
Mini Kinder Bueno Cheesecakes
Every now and then, a recipe comes along that just captures your imagination and taste buds all at once. This Mini Kinder Bueno Cheesecake is one of those delightful treats! Inspired by the irresistible creamy and crunchy goodness of Kinder Bueno bars, these mini cheesecakes bring a twist to traditional desserts. I remember the first time I made them for a family get-together. It was as if I had presented a treasure trove of bliss; everyone eagerly dug in, and the smiles on their faces gave me all the confirmation I needed—this recipe is a winner! Perfect for birthdays, casual gatherings, or just a sweet ending to your day, you’ll find that these mini cheesecakes are a must-try.
Why make this recipe?
Why should you dive into making these Mini Kinder Bueno Cheesecakes? For starters, the taste is absolutely delicious! Picture a creamy, dreamy cheesecake layered over a crunchy biscuit base, topped with those classic chocolate-hazelnut bars. It’s like a love letter to dessert lovers everywhere.
Beyond the flavor, these cheesecakes are quick and easy to whip up. You don’t need advanced baking skills or fancy tools to succeed. This means even beginner cooks can shine in the kitchen. Plus, they are budget-friendly, using simple, pantry staples you probably already have. Kids adore them too, making it a great recipe to bring the whole family together in the kitchen. When you want to impress your guests without spending hours in the kitchen, this cheesecake recipe is your go-to!
How to make Mini Kinder Bueno Cheesecakes
Creating these cheesecakes is both enjoyable and straightforward. The entire process takes about 30 minutes of hands-on time, followed by some waiting for the cheesecakes to set in the fridge. All you’ll really need is a mixing bowl and a great sense of joy as you prepare this delicious treat! If you’re looking for a charming yet fuss-free dessert, you’ve hit the jackpot here.
Ingredients
You will need:
- 200g digestive biscuits
- 100g unsalted butter, melted
- 400g cream cheese
- 100g powdered sugar
- 1 teaspoon vanilla extract
- 200ml heavy cream
- 4 Kinder Bueno bars, chopped
- Extra Kinder Bueno for topping

Step-by-step directions
Crush the digestive biscuits: Start by placing the digestive biscuits in a zip-lock bag and using a rolling pin to crush them into fine crumbs. Mix the crumbs with the melted butter in a bowl. This forms your crust.
Press into molds: Take your mini cheesecake molds and firmly press the buttery biscuit mixture into the bottom of each one. This creates a solid base for your cheesecake.
Mix the cream cheese: In another mixing bowl, combine the cream cheese, powdered sugar, and vanilla extract. Beat it all together until the mixture is smooth and creamy.
Whip the heavy cream: Now, grab a separate bowl and whip the heavy cream until soft peaks form. This gives your cheesecakes that light, airy texture we all love. Here’s a tip: make sure your bowl and whisk are cold for the best results!
Combine the mixtures: Gently fold the whipped cream into your cream cheese mixture. Take your time with this step—mix until just combined to keep the airiness.
Add the Kinder Bueno: Fold in the chopped Kinder Bueno, making sure to distribute them evenly throughout the mixture.
Fill the molds: Spoon the cheesecake mixture over the biscuit base in your molds, filling them to the top.
Refrigerate: Place your mini cheesecakes in the fridge to set for at least 4 hours, or even better, overnight if you can wait!
Serve: Once they have set, carefully remove the cheesecakes from the molds and top with extra pieces of Kinder Bueno before serving. Your guests will be amazed!
How to serve Mini Kinder Bueno Cheesecakes?
When it comes to serving these mini cheesecakes, the options are endless! You can serve them plain for a simple treat, or get creative with garnishes. A drizzle of chocolate sauce or a sprinkle of crushed nuts brings a lovely touch. For an extra indulgent experience, pair each cheesecake with fresh berries or a scoop of vanilla ice cream. They are perfect on their own or as part of a dessert platter with other sweet treats—trust me, they will steal the show!
How to store Mini Kinder Bueno Cheesecakes?
The beauty of these Mini Kinder Bueno Cheesecakes is that they store well! Keep them in an airtight container in the fridge, and they’ll stay fresh for about 3 to 5 days. If you’re feeling adventurous and want to make them ahead of time, you can freeze them for up to 2 months. Just make sure to wrap each cheesecake individually. When you’re ready to enjoy them, let them thaw in the fridge before serving. No need to reheat—just enjoy the cool, creamy goodness straight from the fridge!
Tips for perfect Mini Kinder Bueno Cheesecakes
- Crust consistency: Ensure your biscuit crumbs are fine and evenly mixed with butter—that will give you a solid base that isn’t crumbly.
- Don’t overmix: When folding in the whipped cream and Kinder Bueno, gently combine without overmixing to keep your cheesecake airy and light.
- Chill time: Don’t skimp on the chill time! The cheesecakes need time to set properly, which makes a big difference in texture.
Variations
- Nutty Twist: Swap out some of the digestive biscuits for crushed hazelnuts for an extra nutty flavor.
- Fruit Infusion: Add fresh fruit puree, like raspberry or strawberry, to the cream cheese mixture for a fruity cheesecake experience.
- Chocolate Lovers: Mix in melted chocolate into your cream cheese blend for a richer dessert that appeals to chocolate fans.
FAQs about Mini Kinder Bueno Cheesecakes
Can I substitute the cream cheese?
Absolutely! If you prefer a lighter version, you can use mascarpone cheese or a low-fat cream cheese. Just remember, this will change the texture slightly.
Will it work if I reduce sugar?
You can reduce the sugar if you want a less sweet cheesecake, but keep in mind that it balances the flavors with the creamy components. Start with a small reduction and adjust based on your taste preference.
Can I make them gluten-free?
Yes! Simply use gluten-free biscuits to make the base, and you’ll have delicious gluten-free Mini Kinder Bueno Cheesecakes that everyone can enjoy.
Now that you have this delightful recipe in your hands, it’s time to gather your ingredients and create some sweet memories! Let the Mini Kinder Bueno Cheesecakes transport you and your loved ones to dessert heaven!
Print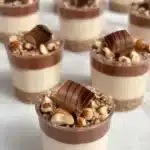
Mini Kinder Bueno Cheesecakes
- Total Time: 240 minutes
- Yield: 8 servings 1x
- Diet: Vegetarian
Description
Delightful mini cheesecakes inspired by Kinder Bueno bars with a creamy and crunchy twist.
Ingredients
- 200g digestive biscuits
- 100g unsalted butter, melted
- 400g cream cheese
- 100g powdered sugar
- 1 teaspoon vanilla extract
- 200ml heavy cream
- 4 Kinder Bueno bars, chopped
- Extra Kinder Bueno for topping
Instructions
- Crush the digestive biscuits: Start by placing the digestive biscuits in a zip-lock bag and using a rolling pin to crush them into fine crumbs. Mix the crumbs with the melted butter in a bowl. This forms your crust.
- Press into molds: Take your mini cheesecake molds and firmly press the buttery biscuit mixture into the bottom of each one. This creates a solid base for your cheesecake.
- Mix the cream cheese: In another mixing bowl, combine the cream cheese, powdered sugar, and vanilla extract. Beat it all together until the mixture is smooth and creamy.
- Whip the heavy cream: Now, grab a separate bowl and whip the heavy cream until soft peaks form. This gives your cheesecakes that light, airy texture. Here’s a tip: make sure your bowl and whisk are cold for the best results!
- Combine the mixtures: Gently fold the whipped cream into your cream cheese mixture. Take your time with this step—mix until just combined to keep the airiness.
- Add the Kinder Bueno: Fold in the chopped Kinder Bueno, making sure to distribute them evenly throughout the mixture.
- Fill the molds: Spoon the cheesecake mixture over the biscuit base in your molds, filling them to the top.
- Refrigerate: Place your mini cheesecakes in the fridge to set for at least 240 minutes, or even better, overnight if you can wait!
- Serve: Once they have set, carefully remove the cheesecakes from the molds and top with extra pieces of Kinder Bueno before serving. Your guests will be amazed!
Notes
Ensure the biscuit crumbs are fine and well-mixed with butter for a solid base. Avoid overmixing the whipped cream and Kinder Bueno to keep the cheesecake airy and light.
- Prep Time: 30 minutes
- Cook Time: 0 minutes
- Category: Dessert
- Method: Chilling
- Cuisine: American
Nutrition
- Serving Size: 1 cheesecake
- Calories: 320
- Sugar: 22g
- Sodium: 200mg
- Fat: 24g
- Saturated Fat: 12g
- Unsaturated Fat: 8g
- Trans Fat: 0g
- Carbohydrates: 30g
- Fiber: 1g
- Protein: 4g
- Cholesterol: 50mg
Keywords: cheesecake, dessert, Kinder Bueno, mini desserts, easy recipe