
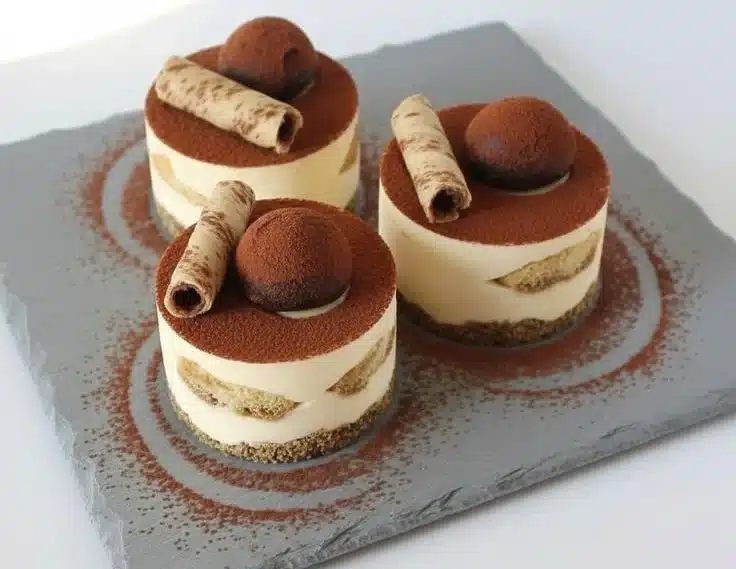
A Sweet Celebration: Mini Tiramisu Cheesecake
When I first discovered mini tiramisu cheesecakes, it felt like I stumbled upon a hidden treasure. I had always loved the classic Italian dessert, with its rich flavors of coffee and creamy mascarpone, but transforming that beloved recipe into a mini cheesecake combines the best of both worlds: indulgence and convenience. These bite-sized delights have become my go-to treat for family gatherings, dinner parties, or even just a cozy night in. Everyone loves them, and I promise, they’re a crowd-pleaser! Whether you’re hosting a get-together or simply craving something sweet, these mini cheesecakes are sure to impress.
Why make this recipe?
There are so many reasons to dive into making these mini tiramisu cheesecakes! First and foremost, they taste absolutely divine. The combination of creamy cheesecake, the richness of coffee, and the crunch of the biscuit base creates a symphony of flavors and textures that dances on your palate.
Secondly, making these cheesecakes is surprisingly easy and quick. You’ll spend around 30 minutes assembling them, and then they’ll chill in the freezer while you relax! Plus, they fit right within any budget—simple ingredients unite to create a dessert that feels gourmet.
If you have kids, they’ll love this treat too! The fun, layered look and the bite-sized portions make them easy to enjoy and share. Even if you’re new to baking, you’ll find this recipe simple to follow—just take your time and have fun with it.
How to make Mini Tiramisu Cheesecake
Creating these mini tiramisu cheesecakes takes about 30 minutes of prep time, plus a few hours for chilling. You’ll need basic kitchen tools like a mixer and a cupcake tray or silicone molds. The beauty lies in not needing any complicated equipment, making this project perfect for kitchens of all sizes. Get ready to impress your friends and family with these delicious little desserts!
Ingredients
Here’s what you’ll need to gather for these delightful mini tiramisu cheesecakes:
- 260 g cookies (mix plain and chocolate)
- 120 g butter (unsalted, melted)
- ⅓ cup water (hot from the kettle)
- 4 tsp gelatine (powder)
- 500 g cream cheese (softened)
- ¾ cup powdered sugar
- ½ cup coffee (warm)
- 1 tsp vanilla extract
- 450 ml heavy cream
- 12 ladyfingers (sponge finger biscuits)
- 1½ cups coffee (cold)
- 300 g dark chocolate (chopped)
- 200 g heavy cream
- ½ tbsp cocoa powder (for dusting)
- 6 wafer rolls (picollo)
Step-by-Step Directions
Let’s break down the process into clear steps:
Step 1: Make the Biscuit Base
First, crush the biscuits into fine crumbs. You can use a stick blender or a wooden rolling pin inside a zip lock bag for this task. Then, mix those crumbs with the melted butter. By adding chocolate cookies to the mix, you create a lovely speckled effect. Press this mixture firmly into the base of a cupcake tray lined with baking cups or silicone molds for easy removal after freezing. Chill this base in the refrigerator while you prepare the cheesecake layer.
Step 2: Prepare the Coffee Cheesecake Filling
In a small bowl, dissolve the gelatine powder in boiling water and set it aside to cool slightly. In a large mixing bowl, beat the softened cream cheese and powdered sugar until you achieve a smooth consistency. Then, add the warm coffee and vanilla extract to this mixture, blending until well combined. Pour in the whipping cream, continuing to beat until everything is nicely mixed.
Now, slowly add the warm gelatine mixture to the cream cheese mix while continuing to beat it, ensuring that it’s fully incorporated. Spoon half of this fluffy cheesecake mixture over your chilled biscuit base. Next, cut the ladyfingers in half, quickly dip them into the cold coffee, and place one in each cupcake liner on top of the cheesecake layer. Top it all off with the remaining cheesecake mixture and smooth out the tops. Freeze these beauties for at least 6 hours or, better yet, overnight.
Step 3: Make the Ganache Truffle Balls
To create the delicious ganache topping, heat 200 ml of heavy cream in a saucepan until it just starts to boil. Pour this hot cream over the chopped dark chocolate and let it sit for about a minute to melt. Stir until the chocolate is smooth and fully blended. Refrigerate the ganache until it firms up, then scoop it into balls using a melon baller for that perfect truffle shape.
Step 4: Garnish and Serve
Once the mini cheesecakes have frozen, gently remove them from the molds and place them on a serving platter. Set a ganache ball atop each mini cheesecake and dust with cocoa powder for that classic tiramisu finish. For the best experience, refrigerate the cheesecakes for at least 2 hours to allow them to thaw slightly before serving.

How to serve Mini Tiramisu Cheesecake?
These mini cheesecakes shine on their own, but you could add a scoop of vanilla ice cream or a dollop of whipped cream on the side for extra indulgence. Serve them with fresh berries to add a pop of color and flavor on your dessert table. If you want to impress your guests further, you can drizzle some chocolate syrup over them or place a few crushed pistachios for a crunchy contrast.
How to store Mini Tiramisu Cheesecake?
You can keep these mini cheesecakes stored in the refrigerator for up to 3 days. If you want to hold on to them longer, freeze them, and they can last for up to 2 months! When you’re ready to enjoy them again, just take them out of the freezer and let them thaw in the fridge for a few hours before serving.
Tips for perfect Mini Tiramisu Cheesecake
- Make sure the cream cheese is softened at room temperature to ensure a smooth, lump-free filling.
- Don’t skip the chilling time; this helps the layers set properly, making handling and serving easier.
- Use freshly brewed coffee for the best flavor; instant coffee just won’t cut it for this recipe.
- When dipping the ladyfingers, do it quickly to prevent them from becoming too soggy.
- If you want a stronger coffee flavor, feel free to add a bit more coffee to the mixture.
Variations
Want to put your own spin on these mini tiramisu cheesecakes? Here are a few variations you could try:
- Nutty Twist: Fold in some finely chopped hazelnuts or almonds into the cheesecake mixture or use them as a topping for added crunch.
- Liqueur Love: Add a splash of coffee liqueur or amaretto to the coffee mixture for an adult version!
- Fruity Finish: Try swapping out the chocolate cookies for vanilla cookies and add a layer of fresh fruit on top of the cheesecake before serving. Strawberries or raspberries would be delightful!
FAQs about Mini Tiramisu Cheesecake
Can I substitute the cream cheese?
Absolutely! For a lighter version, you can use mascarpone cheese, which will give it a more traditional tiramisu taste.
Why did my cheesecake not set properly?
This can happen if the gelatine mixture wasn’t hot enough or wasn’t fully incorporated. Make sure to dissolve the gelatine well and add it slowly while beating the mixture.
Can I make this recipe gluten-free?
Yes! You can find gluten-free cookies to use for the base. Just check the labels to ensure they meet your dietary needs.
Dive right in and enjoy making these delightful mini tiramisu cheesecakes. I know you’ll love them as much as I do!
Print
Mini Tiramisu Cheesecake
- Total Time: 360 minutes
- Yield: 12 servings 1x
- Diet: Vegetarian
Description
A delightful twist on the classic Italian tiramisu, transformed into bite-sized mini cheesecakes combining rich coffee flavors and creamy mascarpone.
Ingredients
- 260 g cookies (mix plain and chocolate)
- 120 g butter (unsalted, melted)
- ⅓ cup water (hot from the kettle)
- 4 tsp gelatine (powder)
- 500 g cream cheese (softened)
- ¾ cup powdered sugar
- ½ cup coffee (warm)
- 1 tsp vanilla extract
- 450 ml heavy cream
- 12 ladyfingers (sponge finger biscuits)
- 1½ cups coffee (cold)
- 300 g dark chocolate (chopped)
- 200 g heavy cream
- ½ tbsp cocoa powder (for dusting)
- 6 wafer rolls (picollo)
Instructions
- Make the Biscuit Base: Crush the biscuits into fine crumbs and mix with melted butter. Press into the base of a cupcake tray lined with baking cups. Chill in the refrigerator.
- Prepare the Coffee Cheesecake Filling: Dissolve gelatine in boiling water. Beat cream cheese and powdered sugar, then add warm coffee and vanilla. Slowly mix in gelatine and half of the cheesecake mixture over the chilled base. Dip ladyfingers in cold coffee and place on top, then add remaining cheesecake mixture.
- Freeze the cheesecakes for at least 6 hours or overnight.
- Make the Ganache Truffle Balls: Heat heavy cream until boiling and pour over chopped dark chocolate, stirring until smooth. Refrigerate until firm and shape into balls.
- Garnish the cheesecakes with ganache balls and dust with cocoa powder. Refrigerate for at least 2 hours before serving.
Notes
For best results, ensure cream cheese is softened and use freshly brewed coffee for flavor.
- Prep Time: 30 minutes
- Cook Time: 0 minutes
- Category: Dessert
- Method: Chilling
- Cuisine: Italian
Nutrition
- Serving Size: 1 serving
- Calories: 320
- Sugar: 24g
- Sodium: 200mg
- Fat: 24g
- Saturated Fat: 14g
- Unsaturated Fat: 8g
- Trans Fat: 0g
- Carbohydrates: 32g
- Fiber: 2g
- Protein: 6g
- Cholesterol: 70mg
Keywords: tiramisu, cheesecake, mini desserts, Italian dessert, easy dessert, no-bake cheesecake