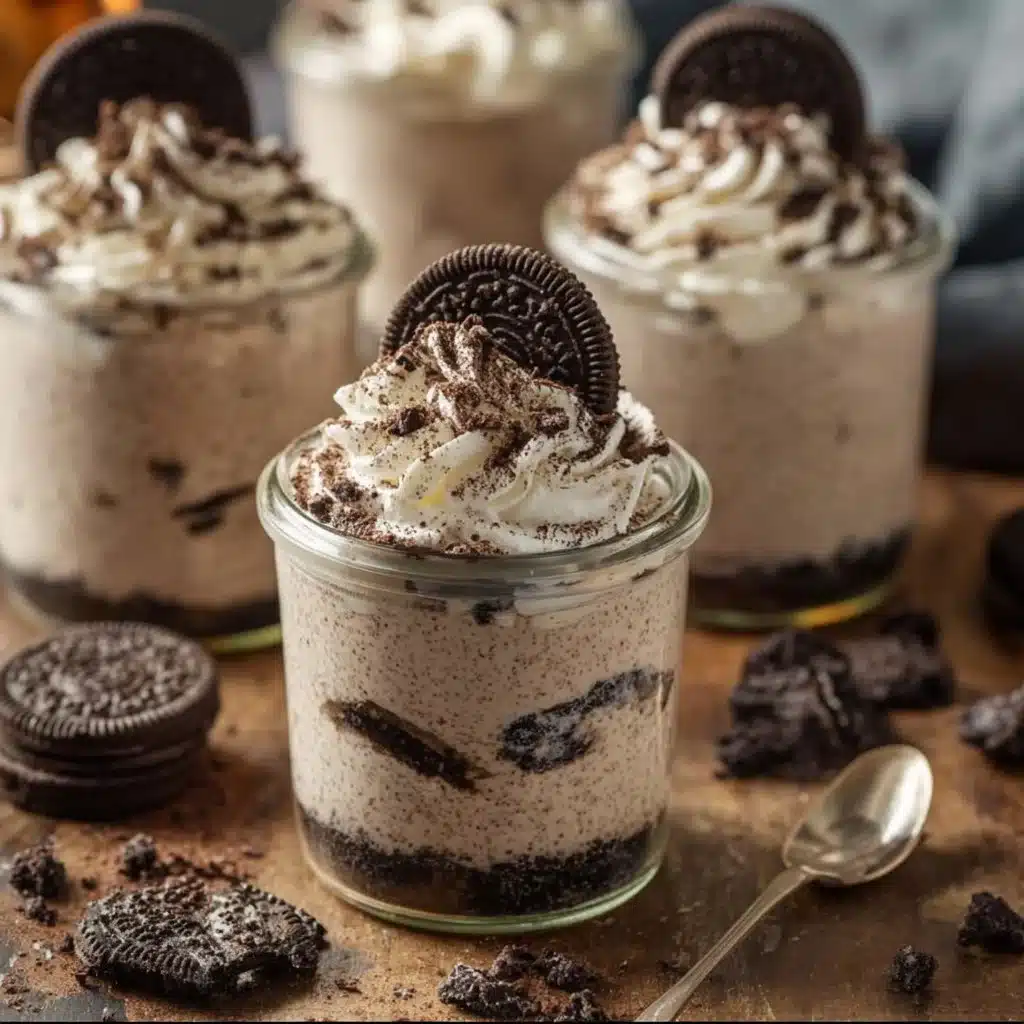
There’s something about dessert that pulls us together. I remember the first time I made Oreo No-Bake Cheesecake Cups. It was a warm summer evening, and my friends and I gathered on the patio with laughter and stories swirling in the air. I wanted to whip up something delicious yet easy, and these indulgent little cups were the perfect treat. Each rich, creamy layer paired with crunchy Oreos had everyone reaching for more. This simple recipe became a favorite in our group, one that I come back to time and again for family gatherings, casual get-togethers, or even when I just want to treat myself. So, if you’re looking for a no-fuss dessert that wows every time, grab your Oreos and let’s dive into this scrumptious recipe!
Why make this recipe?
You might wonder what makes Oreo No-Bake Cheesecake Cups so special. For starters, the taste is simply divine. The combination of creamy cheesecake flavored with sweet vanilla and crunchy Oreo cookies creates a delightful balance that leaves everyone wanting seconds. This dessert is also incredibly quick and easy to make. In under an hour (mostly chilling time), you can put together a treat that looks and tastes gourmet!
Budget-friendly? Absolutely! With only a handful of ingredients, you won’t break the bank preparing this delicious dessert. Plus, kids love it! It’s a win-win, especially when you need a fun cooking project with little ones. You really can’t go wrong with Oreo No-Bake Cheesecake Cups, making it a fantastic option for beginners and seasoned bakers alike.
How to make Oreo No-Bake Cheesecake Cups
Making Oreo No-Bake Cheesecake Cups is a breeze. You’ll spend about 15 minutes preparing the filling and layering it with the crushed Oreos. The hardest part? Waiting for it to chill in the fridge before you dig in! Use a stand mixer if you have one, but a hand mixer works just as well. You don’t need any complicated tools, just a few bowls, and a spoon. Let’s gather the ingredients for this delicious treat!

Ingredients:
- 1 8 oz block of cream cheese, softened
- 1 8 oz. Cool Whip or whipped topping
- 2/3 cup powdered sugar
- 1 tsp vanilla
- 24-26 Oreo cookies (more as desired)
Step-by-step directions:
Now that you have your ingredients, let’s get started on creating these delightful dessert cups!
Prepare the Oreos: Start by placing the Oreos in a plastic bag and sealing it tightly. Grab a rolling pin or a sturdy wooden spoon and crush the Oreos until you have nice crumbly pieces. This gives a delicious crunch to your cheesecake cups!
Spoon the base: Take 1½ – 2 tablespoons of the crushed Oreos and spoon them into the bottom of 6 small dessert dishes. Make sure your dishes hold at least 3/4 cup to 1 cup, so they contain all the delicious layers. Set these aside.
Mix the filling: In a large bowl, use a hand or stand mixer to whip the softened cream cheese and powdered sugar together. Beat until the mixture becomes creamy and smooth. This shouldn’t take long!
Add flavor: Pour in the vanilla extract and mix it in until well combined. The scent will be heavenly!
Fold in the whipped topping: Gently fold in the Cool Whip to incorporate it into the mixture, keeping it light and fluffy.
Combine with Oreos: Now, fold in the remaining crushed Oreos. This gives that irresistible crunch throughout your cheesecake filling.
Layer the cheesecake: Divide the cheesecake filling evenly among the dessert dishes. Gently press it onto the crushed Oreos at the bottom to create a solid foundation.
Chill: Cover the cups with plastic wrap and chill them in the refrigerator for about an hour or until you’re ready to serve.
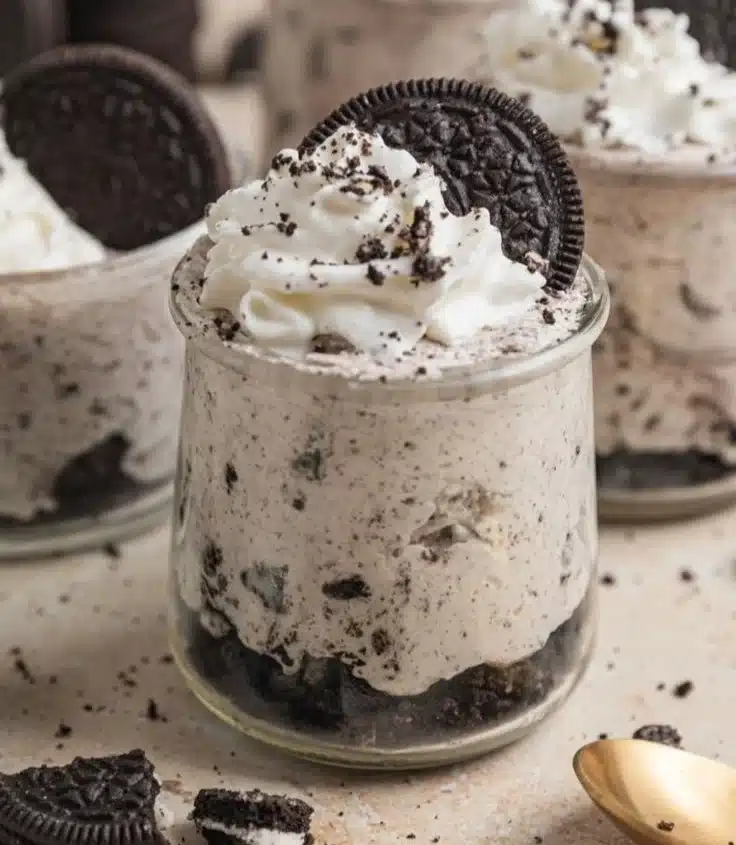
Serve: Before serving, top each cup with a dollop of whipped cream and a sprinkle of extra crushed Oreos. Enjoy this delightful dessert!
How to serve Oreo No-Bake Cheesecake Cups?
These cups make for a fantastic presentation, so don’t hesitate to show them off! You can serve them individually, letting each guest dig into their own treat. Feel free to pair them with fresh fruit like strawberries or raspberries for a refreshing twist. A drizzle of chocolate or caramel sauce on top can elevate the flavors for special occasions, making them a bit fancier.
These cups are perfect for birthdays, family gatherings, or just a cozy night in. They also go well with a hot mug of coffee or tea if you’re looking for a lovely pairing!
How to store Oreo No-Bake Cheesecake Cups?
If you happen to have any leftovers (though I doubt it!), you can store these cheesecake cups in the refrigerator. They’ll stay fresh for about 3-5 days, just cover them with plastic wrap to keep them from absorbing any fridge odors.
You can freeze these cups if you want to make them ahead of time. Just cover them well with plastic wrap and place them in an airtight container. They’ll last in the freezer for about 2-3 months. When you’re ready to enjoy them again, move them to the fridge to defrost for a few hours or overnight. Skip reheating and enjoy them chilled for the best flavor!
Tips for perfect Oreo No-Bake Cheesecake Cups
Soften the cream cheese: Make sure your cream cheese is softened to room temperature. This will help it blend smoothly and prevent lumps in your filling.
Chill for the right amount of time: Don’t skip the chilling time, as it helps the flavors meld together beautifully and allows the cheesecake to set correctly.
Use high-quality Oreos: The flavor of the Oreos is key to the overall taste of the dessert. Stick with the classic versions for the best results!
Mix carefully: When folding in the whipped topping and Oreos, be gentle. You want to keep the fluffiness of the Cool Whip while incorporating the other ingredients.
Avoid overmixing: After adding the whipped topping, avoid overmixing to maintain the lighter texture of the cheesecake.
Variations
Swap the cookies: Feeling adventurous? Try using different cookies instead of Oreos, like chocolate sandwich cookies or even graham crackers for a different taste and texture.
Add flavors: For a fun twist, mix in crushed peppermint candies for a minty version or fresh lemon zest for a citrusy zing.
Make it healthier: To lighten things up, use reduced-fat cream cheese and a light whipped topping. You can also substitute a sugar alternative for the powdered sugar if you want to cut back on sugar.
FAQs about Oreo No-Bake Cheesecake Cups
Can I substitute Cool Whip with homemade whipped cream?
Absolutely! Just whip heavy cream with a little powdered sugar until it holds stiff peaks. This will add a homemade touch to your cheesecake cups.
Why is my filling too watery?
Make sure your cream cheese is well-blended and not overmixed. If it’s too watery, check to see that you used the right amounts of powdered sugar and Cool Whip. Adding a bit more powdered sugar can help thicken the filling.
Will it work if I reduce the sugar?
Yes, you can definitely reduce the sugar if you prefer. Just keep in mind that it may slightly alter the sweetness of the filling, so adjust it to your taste.
With this simple Oreo No-Bake Cheesecake Cups recipe, you’ll be ready to impress everyone with minimal effort. So gather your ingredients, follow these easy steps, and treat yourself and your loved ones to a dessert that’s nothing short of delightful. Happy baking!
Print
Oreo No-Bake Cheesecake Cups
- Total Time: 60 minutes
- Yield: 6 servings 1x
- Diet: Vegetarian
Description
Indulge in these rich and creamy Oreo No-Bake Cheesecake Cups, perfect for any occasion.
Ingredients
- 1 8 oz block of cream cheese, softened
- 1 8 oz. Cool Whip or whipped topping
- 2/3 cup powdered sugar
- 1 tsp vanilla extract
- 24–26 Oreo cookies (more as desired)
Instructions
- Prepare the Oreos: Place the Oreos in a plastic bag and crush them until crumbly.
- Spoon the base: Take 1½ – 2 tablespoons of crushed Oreos and spoon them into the bottom of 6 small dessert dishes.
- Mix the filling: In a large bowl, whip the softened cream cheese and powdered sugar together until creamy and smooth.
- Add flavor: Pour in the vanilla extract and mix until well combined.
- Fold in the whipped topping gently to keep it light and fluffy.
- Combine with Oreos: Fold in the remaining crushed Oreos for crunch.
- Layer the cheesecake: Divide the filling evenly among the dessert dishes, pressing it onto the Oreo base.
- Chill: Cover with plastic wrap and chill in the refrigerator for about 60 minutes.
- Serve: Before serving, top with whipped cream and extra crushed Oreos. Enjoy!
Notes
For a twist, try different cookie flavors or add mint or lemon zest for variation.
- Prep Time: 15 minutes
- Cook Time: 0 minutes
- Category: Dessert
- Method: No-Bake
- Cuisine: American
Nutrition
- Serving Size: 1 cup
- Calories: 320
- Sugar: 22g
- Sodium: 250mg
- Fat: 18g
- Saturated Fat: 10g
- Unsaturated Fat: 6g
- Trans Fat: 0g
- Carbohydrates: 36g
- Fiber: 1g
- Protein: 4g
- Cholesterol: 30mg
Keywords: oreo, no-bake, cheesecake, dessert, easy recipe