
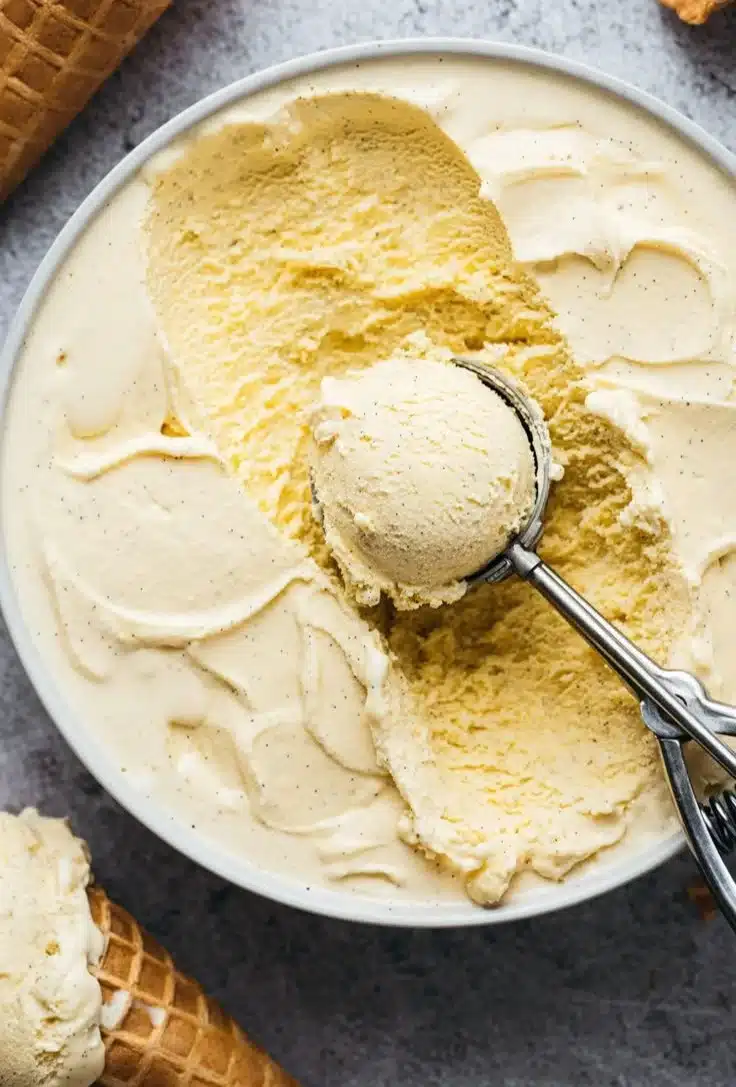
Ice Cream Dreams: Making Vanilla Ice Cream at Home
I’ll never forget the first time I made homemade vanilla ice cream. It was a hot summer day, and I had a sudden craving for that creamy, rich goodness that only homemade ice cream can deliver. I grabbed my ice cream maker and gathered my ingredients, excited to turn my kitchen into an ice cream parlor. As the mixture churned, I could hardly wait to scoop out the first bowl. The moment of truth happened when I tasted it—pure satisfaction! Homemade vanilla ice cream not only brings back memories of family gatherings and backyard barbecues, but it also stands as the perfect treat for any occasion. Whether it’s a simple weeknight dessert or an elaborate sundae bar, making your own vanilla ice cream is a rewarding experience that will surely impress everyone around the table.
Why make this recipe?
Why should you try making your own vanilla ice cream? For starters, it’s incredibly delicious! The freshness of real cream and the sweetness of sugar combined with pure vanilla extract creates a flavor that store-bought varieties just can’t match. Plus, this recipe is refreshingly easy and quick. You don’t need to have a culinary degree to whip up something that would make any ice cream shop proud. Most importantly, this recipe is budget-friendly. A few simple ingredients can yield a big batch of ice cream that can delight the entire family, and kids especially will love it! The hands-on nature of churning the mixture makes it fun and exciting—perfect for families cooking together in the kitchen.
How to make Vanilla Ice Cream
Making vanilla ice cream takes about 20 minutes of hands-on time and requires a few hours of chilling in the freezer. You don’t need any fancy equipment besides an ice cream maker, which is a worthwhile investment if you love frozen treats. The process involves mixing a few ingredients, churning them, and then freezing the mixture until it reaches that delightful scoopable consistency. It’s straightforward enough for beginners but rewarding enough to satisfy any ice cream lover’s palate.

Ingredients
- 2 cups heavy cream
- 1 cup whole milk
- 3/4 cup granulated sugar
- 1 tablespoon pure vanilla extract
- A pinch of salt
Step-by-step directions
Let’s dive into the simple process of making your very own vanilla ice cream. Follow these detailed steps to ensure success with your homemade treat:
- In a mixing bowl, whisk together the heavy cream, whole milk, sugar, vanilla extract, and salt. I recommend whisking until the sugar is completely dissolved, which helps create that smooth texture we all love in ice cream.
- Pour the mixture into your ice cream maker. Churn according to the manufacturer’s instructions. Most ice cream makers take around 20-25 minutes to produce a soft-serve consistency.
- Once it reaches that creamy texture, transfer your ice cream to an airtight container.
- Freeze for at least 4 hours or until firm enough to scoop.
After all that waiting, get ready to enjoy the fruits of your labor!
How to serve Vanilla Ice Cream?
The possibilities for serving your homemade vanilla ice cream are endless! You can enjoy it plain in a bowl, or you can get creative with toppings. My go-to idea is to add fresh berries for a burst of fruity flavor. Warm brownies make a decadent pairing with a scoop of ice cream on top, creating a stunning brownie sundae. If you’re feeling indulgent, drizzle some chocolate or caramel syrup over the top, and don’t forget the chopped nuts or whipped cream for that extra flair!
How to store Vanilla Ice Cream?
Proper storage of your homemade ice cream will keep it fresh and delicious. Generally, you should store it in the freezer, where it will keep for about 2-3 months. Make sure to use an airtight container to prevent it from absorbing any strange flavors from the freezer. If you think you might take a while to finish it, consider layering a piece of parchment paper on top of the ice cream before sealing the container; this can minimize ice crystals developing on the surface.
If for some reason your ice cream becomes too hard, let it sit at room temperature for about 5-10 minutes before scooping. This will help soften it for easier serving.
Tips for perfect Vanilla Ice Cream
- Make sure your ingredients are chilled: Using cold ingredients helps the ice cream freeze uniformly and improve texture.
- Don’t rush the churning process: Giving your ice cream the full churning time really makes a difference in achieving that perfect soft-serve consistency.
- Use high-quality vanilla extract: The better the extract, the more flavorful your ice cream will be. Real vanilla will elevate your dessert.
- Avoid over-churning: If you churn too long, the ice cream can become grainy, so keep an eye on the consistency.
- Be patient: After churning, the waiting period in the freezer is crucial to developing that perfect scoopable texture!
Variations
Now that you’ve mastered basic vanilla ice cream, why not explore some fun variations? Here are a few ideas:
- Chocolate Swirl: Before freezing, swirl in some melted chocolate or your favorite chocolate sauce. This creates a delightful marbled effect and adds richness.
- Cookie Dough: Fold in small chunks of cookie dough at the end of the churning process for a classic treat.
- Fruit Infusion: Blend fresh fruits like strawberries or peaches before mixing them into the base for a refreshing twist on vanilla ice cream.
FAQs about Vanilla Ice Cream
Can I substitute some of the heavy cream?
Yes! You can replace part of the heavy cream with half-and-half if you want a lighter version. However, doing so may alter the richness of the final product.
Why did my ice cream turn out icy instead of creamy?
This usually happens when the mixture isn’t churned long enough or not enough sugar is used. Sugar lowers the freezing point, preventing ice crystals from forming—so don’t skimp on the sugar!
Will it work if I reduce the sugar?
Reducing sugar can make your ice cream harder and icier. If you’re looking to cut down on sugar, try alternatives, but keep in mind the texture may be different.
Go ahead, grab your ice cream maker, and let your creativity run wild! You’ll love the taste of your homemade vanilla ice cream, and it will surely become a regular addition to your dessert repertoire. Enjoy!
Print
Homemade Vanilla Ice Cream
- Total Time: 260 minutes
- Yield: 6 servings 1x
- Diet: Vegetarian
Description
A simple and delicious recipe for making creamy homemade vanilla ice cream.
Ingredients
- 2 cups heavy cream
- 1 cup whole milk
- 3/4 cup granulated sugar
- 1 tablespoon pure vanilla extract
- A pinch of salt
Instructions
- Whisk together the heavy cream, whole milk, sugar, vanilla extract, and salt in a mixing bowl until the sugar is dissolved.
- Pour the mixture into your ice cream maker and churn according to the manufacturer’s instructions for about 20-25 minutes until a soft-serve consistency is achieved.
- Transfer the ice cream to an airtight container.
- Freeze for at least 4 hours or until firm enough to scoop.
Notes
Chill your ingredients before starting, and don’t rush the churning process for the best texture.
- Prep Time: 20 minutes
- Cook Time: 240 minutes
- Category: Dessert
- Method: Churning
- Cuisine: American
Nutrition
- Serving Size: 1 scoop
- Calories: 250
- Sugar: 20g
- Sodium: 60mg
- Fat: 15g
- Saturated Fat: 9g
- Unsaturated Fat: 5g
- Trans Fat: 0g
- Carbohydrates: 25g
- Fiber: 0g
- Protein: 4g
- Cholesterol: 80mg
Keywords: vanilla ice cream, homemade ice cream, dessert, summer treat