
Loaded brownie cheesecake dessert cups are about to become your secret weapon against dessert disappointment. Tired of spending hours on elaborate desserts that fall flat or look messy when served? I’ve been there standing in my kitchen at 10 PM, desperately trying to salvage a collapsed cake for tomorrow’s dinner party.
Hi, I’m Jack from Cooks Foody, and after years of kitchen experiments and plenty of dessert disasters, I’ve perfected these individual brownie cheesecake cups that deliver bakery quality results every single time. These loaded brownie cheesecake dessert cups combine three irresistible layers fudgy brownie base, silky no bake cheesecake, and glossy chocolate ganache all assembled in portable, party-perfect portions.
As someone who’s spent countless evenings testing dessert recipes for friends and family, I can promise you this: these cups will have everyone asking for the recipe. We’ll cover everything from choosing the right brownie consistency to achieving that perfect cheesecake layer, plus pro tips for make-ahead success and stunning presentation ideas.
Table of Contents
Why This Loaded Brownie Cheesecake Dessert Cups Recipe Works
These loaded brownie cheesecake dessert cups solve three major dessert dilemmas: complexity, presentation, and flavor balance. Here’s what makes them absolutely foolproof:
• No-bake convenience meets homemade quality The cheesecake layer requires zero baking skills, while the brownie base can be made from scratch or store bought for ultimate flexibility
• Individual portions eliminate serving stress No more worrying about perfect slices or messy plating; each guest gets their own Instagram worthy dessert
• Make-ahead friendly for busy hosts Assemble these loaded brownie cheesecake dessert cups up to 2 days in advance, leaving you free to focus on other party prep
• Customizable for any occasion From birthday parties to elegant dinner gatherings, you can dress these up or keep them casual with different toppings and garnishes
Choosing the Right Brownie Base for Loaded Brownie Cheesecake Dessert Cups
Best Brownie Types for This Recipe
The foundation of perfect loaded brownie cheesecake dessert cups starts with the right brownie consistency. You want brownies that are fudgy enough to provide rich chocolate flavor but sturdy enough to support the cheesecake layer without becoming soggy.
Fudgy brownies work best because they maintain moisture while providing structural integrity. Avoid cakey brownies, which can become dense and compete with the creamy cheesecake layer. The ideal brownie should be slightly underbaked that perfect balance where a toothpick comes out with a few moist crumbs.
Buying Tips for Store Bought Options
When time is tight, quality store bought brownies can absolutely work for these loaded brownie cheesecake dessert cups. Look for brownies that feel slightly soft to the touch rather than hard or crusty. Brands like Ghirardelli or bakery section brownies from grocery stores typically have the right texture.
Pro tip: If your store bought brownies seem too dry, brush them lightly with simple syrup (equal parts sugar and water) before adding the cheesecake layer.
Homemade Substitutions
Want to switch up the chocolate base? Try these variations:
- Blondie base: Substitute vanilla blondies for a white chocolate twist
- Cookie crust: Crush chocolate sandwich cookies mixed with melted butter
- Gluten-free option: Use almond flour brownies or gluten free brownie mix
Ingredients & Prep for Loaded Brownie Cheesecake Dessert Cups
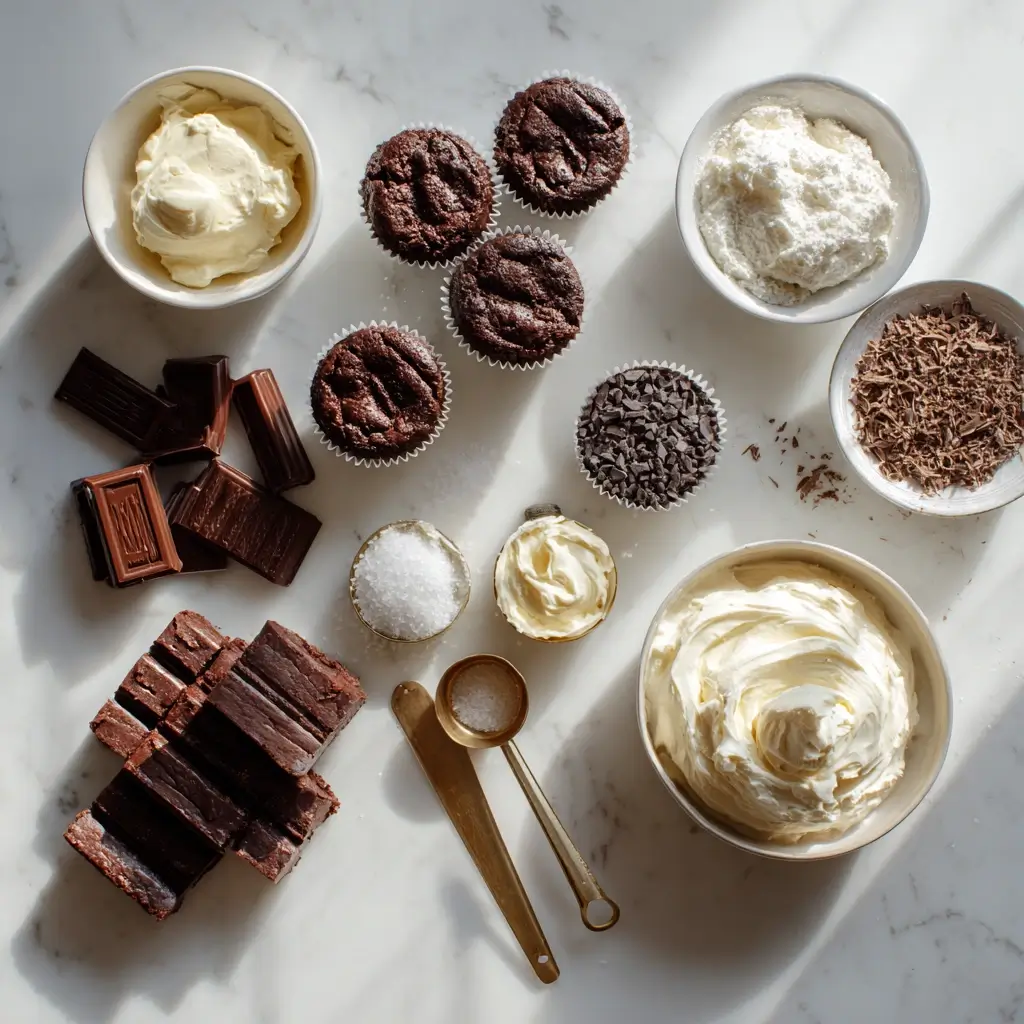
Brownie Base Essentials
For homemade brownies in these loaded brownie cheesecake dessert cups, you’ll need:
- 1/2 cup butter (use real butter for best flavor)
- 1 cup sugar (granulated works perfectly)
- 2 eggs (room temperature for better mixing)
- 1 tsp vanilla extract (pure vanilla makes a difference)
- 1/3 cup cocoa powder (Dutch-processed for richer color)
- 1/2 cup flour (all-purpose)
- 1/4 tsp salt (enhances chocolate flavor)
- 1/4 tsp baking powder (creates perfect texture)
Prep tip: Line your baking pan with parchment paper for easy removal and cutting into perfect squares for your dessert cups.
No-Bake Cheesecake Layer Components
The magic of these loaded brownie cheesecake dessert cups lies in this silky, no-fuss cheesecake layer:
- 8 oz cream cheese, softened (leave out 2-3 hours before making)
- 1/2 cup powdered sugar (sift to avoid lumps)
- 1 tsp vanilla extract
- 1 cup whipped topping or freshly whipped cream
Critical step: Ensure your cream cheese is completely softened to avoid lumps in your cheesecake layer. Lumpy cheesecake will ruin the smooth, professional look of your loaded brownie cheesecake dessert cups.
Chocolate Ganache Essentials
For the glossy finishing touch:
- 1/2 cup heavy cream
- 4 oz dark chocolate, chopped (60-70% cocoa works best)
- 1 tbsp butter (for extra shine)
- Pinch of salt (enhances chocolate flavor)
Step-by-Step Instructions for Loaded Brownie Cheesecake Dessert Cups
Pre-Assembly Prep for Loaded Brownie Cheesecake Dessert Cups
Start by gathering 6-8 clear plastic cups or glass dessert bowls the presentation is half the appeal of these loaded brownie cheesecake dessert cups. If making homemade brownies, bake them first and let them cool completely. Cut brownies into small cubes that will fit nicely in your chosen vessels.
Soften cream cheese by leaving it at room temperature for 2-3 hours, or microwave in 15-second intervals if you’re short on time.
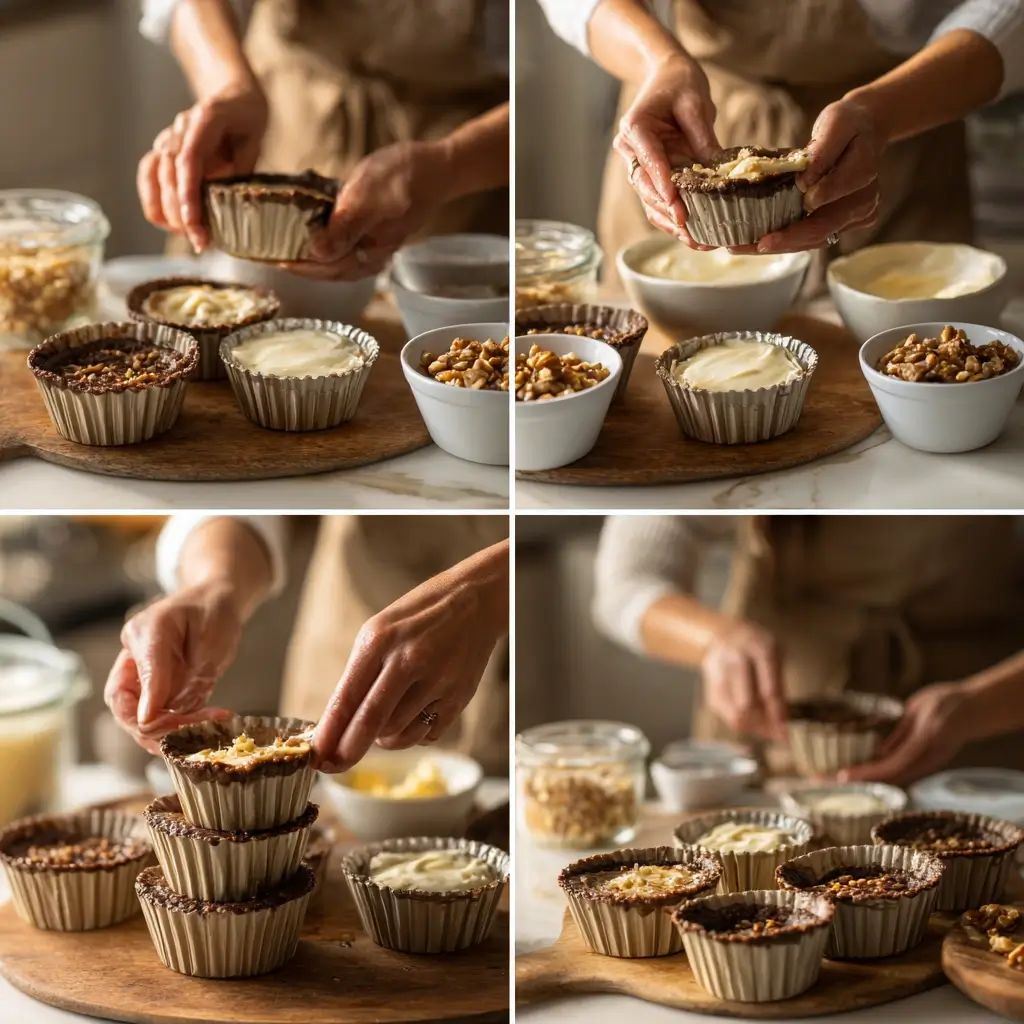
Assembly Method for Loaded Brownie Cheesecake Dessert Cups
Layer 1: Place brownie cubes in the bottom of each cup, pressing gently to create a compact base. You want about 1/3 of the cup filled with brownie pieces.
Layer 2: Beat softened cream cheese until smooth and fluffy (2-3 minutes with electric mixer). Gradually add powdered sugar, beating until combined. Fold in vanilla and whipped cream until just combined don’t overmix or you’ll deflate the airiness.
Spoon or pipe the cheesecake mixture over the brownie base, filling cups about 2/3 full. Smooth tops with a spoon.
Ganache Topping for Loaded Brownie Cheesecake Dessert Cups
Heat heavy cream in a small saucepan until just simmering (don’t boil). Pour over chopped chocolate in a bowl and let sit for 2 minutes. Stir from center outward until smooth and glossy. Stir in butter and salt.
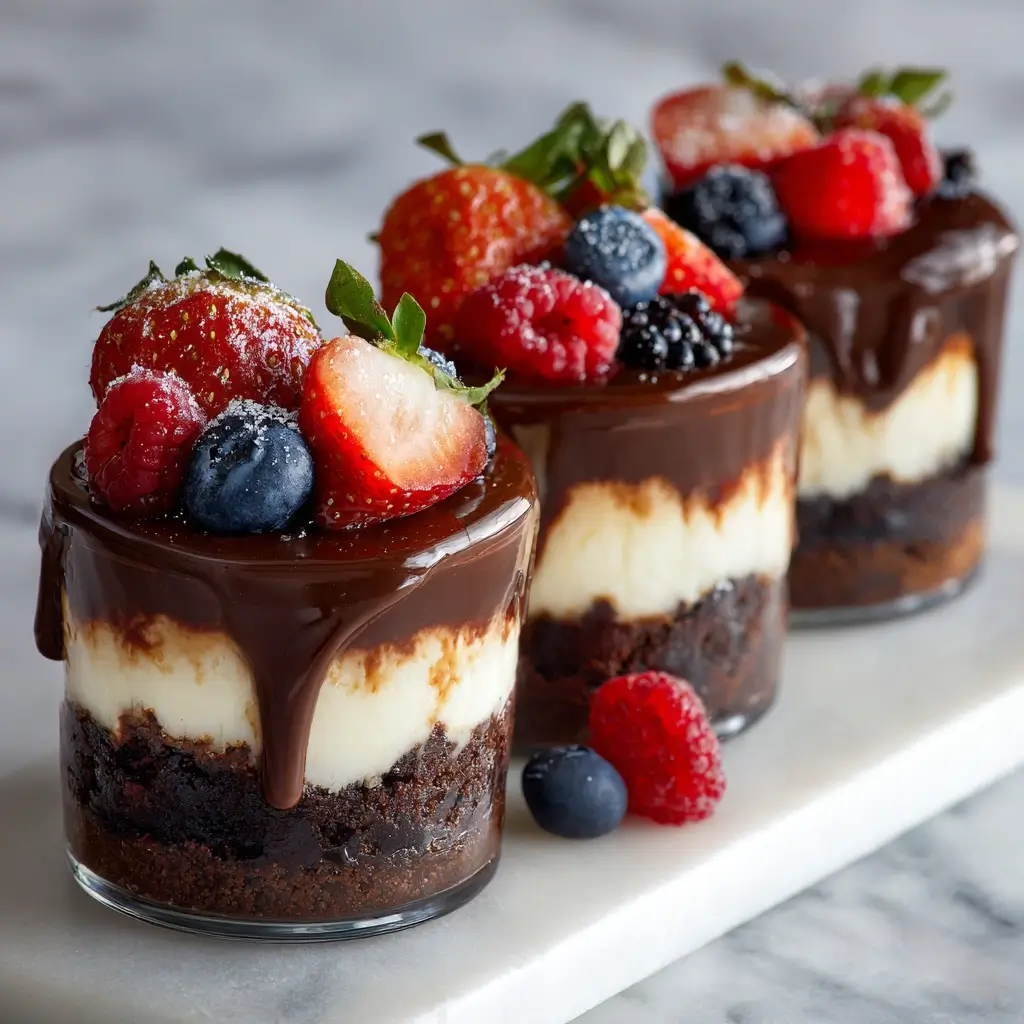
Let ganache cool for 5-10 minutes until slightly thickened but still pourable. Spoon over each cheesecake layer, allowing it to drip slightly down the sides for that professional bakery look.
Final Assembly for Loaded Brownie Cheesecake Dessert Cups
Refrigerate assembled loaded brownie cheesecake dessert cups for at least 2 hours, but preferably 4 hours or overnight. This allows all layers to set properly and flavors to meld together beautifully.
Pro Tips for Perfect Loaded Brownie Cheesecake Dessert Cups
Avoiding Common Mistakes with Loaded Brownie Cheesecake Dessert Cups
Temperature control is crucial. Room temperature cream cheese mixes smoothly without lumps, while cold cream cheese will create a chunky, unprofessional-looking cheesecake layer. Similarly, don’t add hot ganache directly to cold cheesecake let it cool slightly first.
Don’t overmix the cheesecake layer. Once you add the whipped cream, fold gently just until combined. Overmixing deflates the airiness that makes these loaded brownie cheesecake dessert cups so luxurious.
Essential Tool Recommendations
- Electric hand mixer: Crucial for smooth, lump free cheesecake
- Fine-mesh sieve: For sifting powdered sugar
- Small offset spatula: Perfect for smoothing cheesecake layers
- Piping bag or zip-top bag: Creates professional-looking cheesecake layers
Storage & Make Ahead Success
These loaded brownie cheesecake dessert cups actually improve with time. Make them 1-2 days ahead and store covered in the refrigerator. The flavors meld beautifully, and the brownies soften slightly for the perfect texture contrast.
For longer storage, freeze assembled cups (without ganache) for up to 1 month. Thaw overnight in refrigerator and add fresh ganache before serving.
Flavor Variations for Loaded Brownie Cheesecake Dessert Cups
Decadent Additions
Transform your loaded brownie cheesecake dessert cups with these indulgent mix-ins:
- Salted caramel swirl: Drizzle caramel sauce between layers and sprinkle with flaky sea salt
- Peanut butter paradise: Add 2 tbsp peanut butter to cheesecake layer and top with chopped peanuts
- Espresso enhancement: Mix 1 tsp instant espresso into brownie batter for mocha-flavored loaded brownie cheesecake dessert cups
Seasonal Twists
Spring/Summer: Add fresh berry compote between layers and garnish with mint leaves Fall Incorporate pumpkin spice into the cheesecake layer and top with candied pecans Winter: Create peppermint bark loaded brownie cheesecake dessert cups with crushed candy canes and white chocolate ganache
Dietary Adaptations
| Dietary Need | Modification | Notes |
|---|---|---|
| Gluten-Free | Use almond flour brownies or GF brownie mix | Ensure all other ingredients are certified GF |
| Keto/Low-Carb | Sugar-free sweeteners, keto brownie base | Use erythritol or monk fruit sweetener |
| Dairy-Free | Coconut cream, vegan cream cheese | Chill coconut cream overnight before whipping |
| Lighter Version | Greek yogurt in cheesecake layer, reduced sugar | Maintain 1:1 ratio of cream cheese to Greek yogurt |
Serving Suggestions for Loaded Brownie Cheesecake Dessert Cups
These loaded brownie cheesecake dessert cups are stunning on their own, but the right accompaniments can elevate them to restaurant quality desserts.
Fresh fruit pairings: Strawberries, raspberries, or sliced bananas add brightness and cut through the richness. The acidity of berries particularly complements the chocolate cheesecake combination.
Beverage pairings: Serve alongside espresso or strong coffee to balance the sweetness. For special occasions, try with dessert wine like Port or a rich Cabernet Sauvignon. For non-alcoholic options, consider cold brew coffee or even sparkling water with lemon to cleanse the palate.
Presentation ideas: Place each cup on a small dessert plate with a delicate spoon. Dust with powdered sugar or cocoa powder just before serving. For elegant dinner parties, add a small cookie or chocolate wafer as garnish.
FAQs About Loaded Brownie Cheesecake Dessert Cups
Can I make loaded brownie cheesecake dessert cups without eggs in the brownies? Absolutely! You can use store bought brownies, or make eggless brownies using applesauce or commercial egg replacers. The no bake cheesecake layer contains no eggs, making most of the recipe already egg free.
How far ahead can I make these loaded brownie cheesecake dessert cups? These actually taste better after sitting overnight. Make them up to 2 days ahead and store covered in the refrigerator. Add any fresh garnishes just before serving.
Can I freeze loaded brownie cheesecake dessert cups? Yes, but freeze them before adding the ganache layer. Wrap individual cups well and freeze up to 1 month. Thaw overnight in the refrigerator and add fresh ganache before serving.
What if my cheesecake layer is too thick or thin? Too thick? Fold in an additional 2-3 tablespoons of whipped cream. Too thin? Beat in an extra tablespoon of powdered sugar or add a bit more cream cheese.
Are loaded brownie cheesecake dessert cups safe for pregnant women? Yes! Since the cheesecake layer is made with pasteurized cream cheese and contains no raw eggs, these are perfectly safe during pregnancy. Just ensure all dairy products are fresh and properly refrigerated.
Conclusion
Fire up your mixer and treat yourself to these incredible loaded brownie cheesecake dessert cups tonight! There’s something magical about creating individual desserts that look bakery professional but require no special skills or equipment. These cups have become my go to for everything from casual family dinners to elegant dinner parties.
Join the thousands of home bakers who’ve discovered the joy of make ahead desserts that actually get better with time. Your guests will be amazed, and you’ll love how stress free entertaining becomes when dessert is already handled.