Are you tired of serving the same old appetizers at gatherings? Do your snack options leave guests underwhelmed? At Cooks Foody, we’ve created these garlic butter cheese bombs to solve your appetizer dilemmas once and for all.
As part of our culinary journey at Cooks Foody, Elizabeth discovered this recipe during an impromptu dinner party when ingredients were limited but expectations were high.
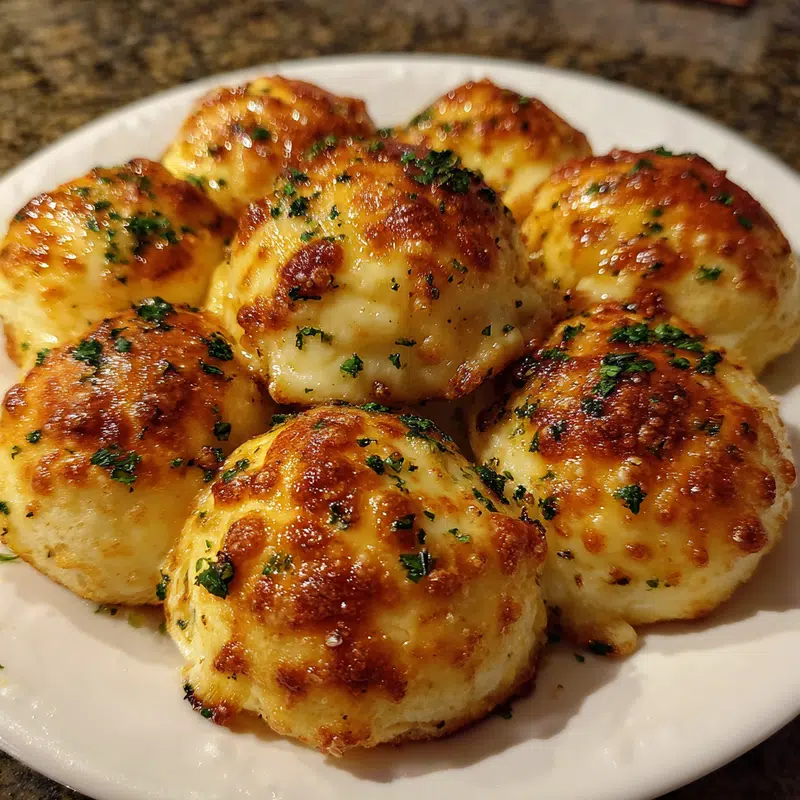
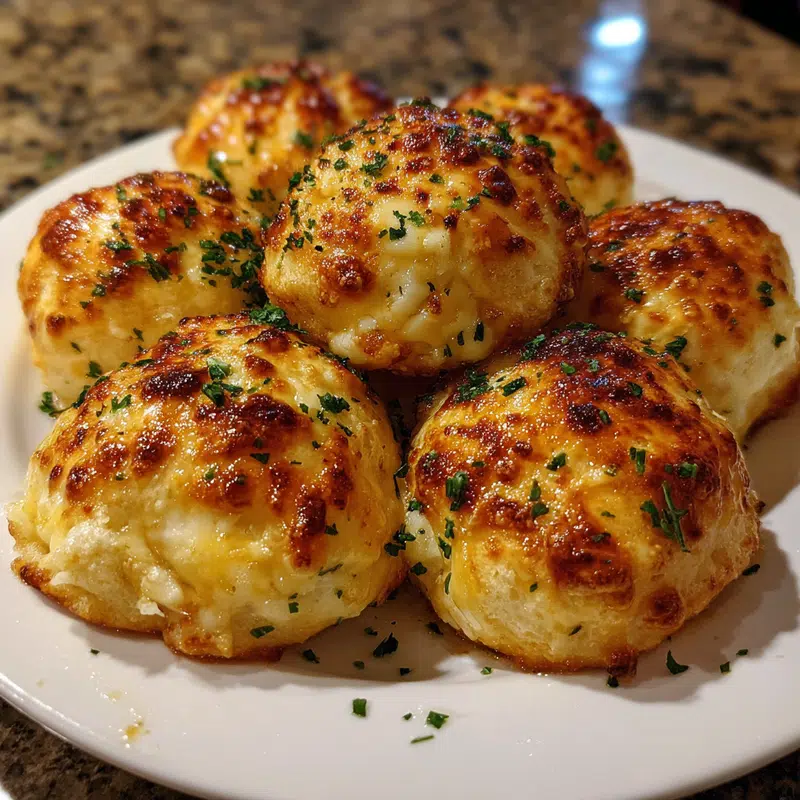
What started as a kitchen experiment quickly became our most requested recipe! These pillowy bites of cheesy, garlicky goodness deliver maximum flavor with minimal effort perfect for both cooking beginners and seasoned home chefs alike.
In this comprehensive guide, you’ll learn how to select the best ingredients, master the simple preparation process, and customize these cheese bombs to suit any occasion.
We’ll also share expert tips for achieving that perfect golden-brown exterior while maintaining a gooey, stretchy cheese center that will have everyone reaching for seconds.
Why These Garlic Butter Cheese Bombs Work
These garlic butter cheese bombs have become our signature appetizer at Cooks Foody for good reason:
- Uses affordable, easy-to-find ingredients from any grocery store
- Requires just 30 minutes from prep to table
- Creates an impressive presentation with minimal effort
- Combines three irresistible flavors: bread, cheese, and garlic butter
- Works equally well for casual game days or elegant gatherings
Choosing the Right Ingredients for Garlic Butter Cheese Bombs
Best Bread Options for Cheese Bombs
The foundation of perfect garlic butter cheese bombs starts with selecting the right dough. While refrigerated biscuit dough is our go-to recommendation for its convenience and consistent results, you have several excellent options:
- Refrigerated biscuit dough (Pillsbury Grands work perfectly)
- Pizza dough (store-bought or homemade)
- Crescent roll dough (slightly flakier texture)
- Homemade bread dough (for the dedicated baker)
Cheese Selection for Optimal Melt
The star of these garlic butter cheese bombs is undoubtedly the cheese. For the perfect stretchy, gooey center:
- Mozzarella: Our top choice for its superior melting quality and mild flavor
- Cheddar: Adds a sharper flavor profile
- Monterey Jack: Provides a buttery melt
- Colby: Offers a mild but distinctive taste
Pro tip: Cube your cheese rather than using shredded varieties—cubes melt more slowly, reducing the risk of cheese leaking out during baking.
Garlic Butter Components
Creating the perfect garlic butter coating elevates these cheese bombs from good to unforgettable:
- Unsalted butter (allows you to control salt content)
- Fresh garlic (minced finely for best flavor distribution)
- Italian herbs (dried or fresh)
- Parmesan cheese (adds umami depth to the coating)
Ingredients & Prep for Garlic Butter Cheese Bombs

Bomb Base Essentials
- 1 can (16.3 oz) refrigerated biscuit dough
- 4 oz mozzarella cheese, cut into 8 cubes
- 2 tablespoons fresh parsley, chopped (for garnish)
Garlic Butter Mixture
- 4 tablespoons unsalted butter
- 3 cloves garlic, finely minced
- 1 teaspoon Italian seasoning
- 2 tablespoons grated Parmesan cheese
- ¼ teaspoon salt (adjust to taste)
Pantry Staples
- Olive oil (for greasing baking dish)
- Red pepper flakes (optional, for heat lovers)
- Dried oregano (enhances Italian flavor profile)
Step-by-Step Cooking Instructions for Garlic Butter Cheese Bombs
Pre-Cooking Prep for Cheese Bombs
- Preheat your oven to 375°F (190°C).
- Lightly grease a round baking dish or cast-iron skillet.
- Separate the biscuit dough into 8 individual biscuits.
- Flatten each biscuit into a 3-inch circle with your palms.
Assembly Method for Cheese Bombs
- Place one cheese cube in the center of each flattened biscuit.
- Carefully fold the edges of the dough over the cheese cube, ensuring there are no openings.
- Pinch and seal the edges firmly to prevent cheese from leaking during baking.
- Roll between your palms to form a smooth ball shape.
Butter Application for Cheese Bombs
- In a small saucepan, melt butter over medium-low heat.
- Add minced garlic and cook for 30 seconds until fragrant (don’t brown the garlic).
- Remove from heat and stir in Italian seasoning, salt, and Parmesan cheese.
- Dip each dough ball into the garlic butter mixture, coating thoroughly.
- Arrange the coated bombs in your prepared baking dish, leaving slight space between each.
Baking Process for Cheese Bombs
- Bake for 18-22 minutes, until the bombs are golden brown.
- Check at the 15-minute mark if browning too quickly, cover loosely with foil.
- The internal temperature should reach 190°F to ensure the dough is fully cooked.
- Allow to cool for 5 minutes before serving (the cheese inside will be extremely hot).
Pro Tips for Perfect Garlic Butter Cheese Bombs
Avoiding Common Cheese Bomb Mishaps
- Seal dough completely to prevent cheese leakage
- Don’t overheat your garlic when making the butter (it becomes bitter when browned)
- Allow bombs to cool briefly before serving to prevent burned mouths
- Use room-temperature dough for easier handling
Tool Recommendations for Cheese Bombs
- Cast iron skillet provides excellent heat distribution
- Silicone brush for applying extra butter after baking
- Small ice cream scoop for consistent dough portions
- Parchment paper for easy cleanup
Storage & Reheating Instructions for Cheese Bombs
- Store leftovers in an airtight container for up to 2 days
- Reheat in a 325°F oven for 5-7 minutes
- Microwave on 50% power for 20-30 seconds (though texture will be softer)
Want more delicious appetizer inspiration? Check out our Moroccan Cauliflower with Tahini Honey for another crowd-pleasing option!
Flavor Variations for Garlic Butter Cheese Bombs
Sweet & Spicy Cheese Bombs
- Add a pinch of cayenne to the butter mixture
- Drizzle with honey before serving
- Include a tiny jalapeño piece with the cheese cube
Herb-Infused Cheese Bombs
- Mix fresh rosemary, thyme, and basil into the dough
- Use herb-infused butter for the coating
- Sprinkle with flaky sea salt before baking
Global Flavor Cheese Bombs
- Mediterranean: Use feta cheese and add olives
- Mexican: Include pepper jack cheese with taco seasoning
- Italian: Add pepperoni pieces with the mozzarella
| Flavor Variation | Cheese Type | Special Ingredient | Dipping Sauce |
|---|---|---|---|
| Classic | Mozzarella | Italian herbs | Marinara |
| Spicy | Pepper Jack | Red pepper flakes | Ranch |
| Mediterranean | Feta | Olives | Tzatziki |
| Breakfast | Cheddar | Cooked bacon bits | Maple syrup |
| Dessert | Cream cheese | Cinnamon sugar | Chocolate |
If you love these savory bombs, you might want to try our sweet version: Candy Cane Brownie Bombs for a delicious dessert option!
Serving Suggestions for Garlic Butter Cheese Bombs
These versatile garlic butter cheese bombs pair beautifully with a variety of accompaniments:
- Dipping sauces: Marinara, ranch, or warm pizza sauce
- Fresh side salad with light vinaigrette
- Italian wedding soup for a complete meal
- Vegetable crudités for a balanced appetizer spread
For larger gatherings, create a complete appetizer spread with these cheese bombs as the centerpiece, surrounded by our Carrot Cake Cheesecake for dessert and other finger foods.
FAQs About Garlic Butter Cheese Bombs
Can I make garlic butter cheese bombs ahead of time?
Yes! Prepare the bombs up to the point of baking, refrigerate for up to 24 hours, then bake when ready. You may need to add 2-3 minutes to the baking time if cooking from cold.
Can I freeze garlic butter cheese bombs?
Absolutely. Freeze unbaked bombs on a baking sheet until solid, then transfer to a freezer bag. When ready to bake, no need to thaw just add about 5-7 minutes to the baking time.
My cheese leaked out during baking. What went wrong?
This usually happens when the dough isn’t completely sealed around the cheese. Make sure to pinch the seams firmly and roll the ball between your hands to ensure a good seal.
Can I use string cheese instead of cheese cubes?
Yes! String cheese works wonderfully and comes pre-portioned. Simply cut each stick into 2-3 pieces depending on your preferred cheese-to-bread ratio.
Are garlic butter cheese bombs suitable for vegetarians?
Yes, these are vegetarian-friendly as written. Just ensure the specific brands of biscuit dough and cheese you use don’t contain animal rennet or other non-vegetarian ingredients.
Looking for a sweet ending to your meal? Try our Eton Mess dessert after enjoying these savory cheese bombs!
Pull-Apart Perfection
Garlic butter cheese bombs have revolutionized our approach to entertaining at Cooks Foody. They embody what we love most about cooking bringing people together through food that’s approachable yet impressive, familiar yet exciting
For more inspiration and to share your cheese bomb creations, check out our Pinterest page where we’re always pinning new recipe ideas and cooking tips to help you impress your family and friends!